Pages

Friday, December 30, 2011

What a Difference a Year Makes~

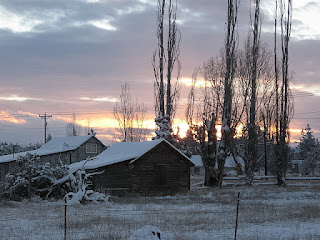
The view out the back door in our home in Redmond...miss that!
 As I look back on 2011, there have been a lot of changes in my life...

1. My hubby getting a new job
2. Selling our home in Redmond
3. Buying a home in Lebanon
4. Adjusting to my hubby's graveyard shift
5. Learning I was going to be a grandmother to twins in 2012
6. Missing my daughter and son & his wife in Redmond & my wonderful friend, Melody
7. Meeting a new friend, Sonya & reconnecting with old friends
8.  Leaving a church family I loved; still not settled in a church here
9.  Back surgery & it's ups & downs
10. Still working on the ME part of my life...what do I want to do?

I'm sure if I thought about it long enough, I could come up with a whole lot more!  But isn't that just life?  Each & every one of us in this world has ups & downs...changes that are good, some bad, & some that just take getting used to.  I know that for myself, I keep evaluating what I am leaving as a legacy for my family.  Sometimes I just don't do things the way others think I should. I fail at "not being like my mother".  I want to have a joy in life that flows from within me and is apparent to others, even my family.  Do you ever feel that way?


Ahhhh a new year, full of promise, full of hope, full of blessings, full of some sorrow...  What do you think of when you think of a new year approaching?  Is it just about the New Year's resolutions or does it go deeper?  I know, for me, I need to reconnect with God and church this year.  I want to have a deeper relationship with my hubby and kids; which are good right now, but I want great, with each one of them.  I want to be the best grandmother I can be.  Other than those things...well, I'm still working on that.  I trying to find "ME". 

Wednesday, December 28, 2011

Giveaway Win from Sugar Pink Boutique


I won the giveaway recently from Jennifer at Sugar Pink Boutique for a strand of candylights "Hello Kitty".  They are the prettiest shades of pink; bright pink & light pink, plus white.  I immediately put them around a 3~tier wire stand/shelf I got at a vintage fair last month in my studio, then I added some greenery, pink & chartreuse vintage glass ornaments, and vintage bead garlands in the same colors.  I love the way it casts such a pretty glow!  Soon I will probably put them around my window when I take down the Christmas decorations.  I want to thank Jennifer from Sugar Pink Boutique for having such a cool giveaway & choosing me.  It is so much fun to receive a gift from a giveaway.  You need to check out Jennifer's store, Sugar Pink Boutique because she has some wonderful items like trims, candylights, & so much more!
Thanks Jennifer!

Blessings,
Cindy


Tuesday, December 27, 2011

Giveaway Win from Shannon at Cozy Home Scenes

I was happy to receive an email from Shannon at Cozy Home Scenes informing me I had won a prize in her Gingerbread Party.  I had so much fun getting my dining room all decorated in gingerbreads & sharing the post on Shannon's blog for the Gingerbread Party.  I won a pretty apron in, what else, but gingerbread fabric!  I got it a few days before Christmas, in time to use it for some cookie baking.  Shannon told me in her sweet card that she had found some special trim in her stash and added it to my apron to make it extra special.  How sweet is that?  Well, I have to agree...the trim is wonderful.  The apron has a large pocket too.  The apron came all Christmas gift wrapped with a bow & pretty card.  I want to thank Shannon so much for having such a fun party and choosing me as one of the winners.  I love my apron & will enjoy wearing it for many years to come.
Hope everyone had a wonderful Christmas.  Ours was very nice.  We had our eldest son & his wife over.  My hubby & son worked on prime~rib together and it was yummy and I tried a new biscuit recipe called angel biscuits.  They were light & fluffy; made with buttermilk and yeast, which isn't in my old recipe.  We had a non~traditional meal which was a nice change.  Have a wonderful week!

Blessings,
Cindy

Monday, December 26, 2011

Pink Roses in December

I love roses and since we moved into our new home in a new town, I have enjoyed a rose bush in our front yard.  It has been producing beautiful roses for months now.  I thought after we had our 1st frost that the roses would have been long gone by now...but, no...there were more to welcome the Christmas season.  I couldn't help but put them in a vase on my table to enjoy.  They are very fragrant & lovely.  So here are my Pink December Roses...
Blessings,
Cindy

Sunday, December 25, 2011

Amazing Grace~ Beautiful Words...Beautiful Song

As soon as I heard this rendition of Amazing Grace, I knew I had to share it with you.  It is one of my all time favorite hymns.  During the Christmas season I am reminded how the precious blood of Jesus has cleansed a sinner like me.  I am so grateful for the gift of Jesus.  Although I will never be perfect, I know that God accepts me as I am and helps me to be a better person through His strength and love.  
Phil 4:7~ And the peace of God, which transcends all understanding, will guard your hearts and your minds in Christ Jesus.


Blessings,
Cindy

Friday, December 23, 2011

~Have a Blessed Christmas~


And there were shepherds living out in the fields nearby, 
keeping watch over their flocks at night. 
An angel of the Lord appeared to them,
and the glory of the Lord shone around them, 
and they were terrified.   
But the angel said to them, 
“Do not be afraid. I bring you good news of great joy 
that will be for all the people.   
Today in the town of David a Savior has been born to you; 
he is Christa the Lord.  
This will be a sign to you: 
You will find a baby wrapped in cloths and lying in a manger.
”Suddenly a great company of the heavenly host appeared with the angel,
praising God and saying,
“Glory to God in the highest 
and on earth peace to men on whom his favor rests.” 


May Peace, Joy, and Love be with you this Christmas, whether you celebrate alone or with loved ones.  The Reason for the Season is Jesus, not Santa & his elves, not gifts to each other, and not the holiday meal & goodies galore.  May each of us stop for a moment and reflect on His Gift to us, more precious than gold or anything this world has to offer.  

Have a Blessed Christmas Everyone!
Cindy

Thursday, December 22, 2011

Two More Gifts Done & Reflection on Christmas Pasts...

I finished two more gifts.  The first is for my sis~in~love, but shhhh she doesn't know!  I will mail it out after Christmas.  Her favorite color is purple/lavender and her name starts with a "K".  Bet you could have figured out that one!!  The frame is leaded glass & stained glass with wire & bead accents.  I fell in love with it when I found it & knew that I would make something with it for her.
 The 2nd gift was for my friend, Sonya of Counting My Blessings.  She is so talented & receives so many beautiful things from her blogging friends that I wasn't sure what to make her.  I am NOT a seamstress AT ALL, so I don't' know what got into me to even make it, but I loved the pattern in the Jan/Feb issue of Create & Decorate.  I have to say that I really enjoyed making it.  I know I will be making more next year!!  I think I need one too!  The glass candle holder the pin cushion is on has vintage white buttons in it!  I couldn't resist adding them!  This is design of patchwork pieces that have been machine quilted on batting. 
I am done making gifts now.  I remember many years ago, when I had younger kids, {I was younger too!  ;-)} staying up most of Christmas Eve night getting presents done for family members.  I learned that making last minute gifts, buying on Christmas Eve, & wrapping presents late into the night, did not make for a Merry Christmas & jolly Mom!!  I was so frazzled & exhausted that all I wanted to do was take a nap instead of cooking a huge meal!  Things are much more laid back now than they were when our kids were little.  We used to have both my family & my hubby's family at our house with him & I cooking the turkey & trimmings.  Now, we just have our eldest & his lovely wife over for the main meal on Christmas Day this year.  We already had a little get together with our other kids last weekend.  For us, it will be a pretty quiet Christmas.  But that is ok.  Next year we will have little twin babies to cuddle & love! 


Blessings,
Cindy


I'm linking to these parties:
Sugar Pink Boutique~Friday Fun Link up Party
French Country Cottage~ Feathered Nest Friday
2805~ Potpourri Friday #16
At The Picket Fence~Inspiration Friday #45
The Charm Of Home~ Home Sweet Home #46
From My Front Porch~Treasure Hunt Thursday #36
Katherine's Corner~Thursday Favorite Things Blog Hop  15
The Shabby Nest~ Frugal Friday
How Sweet the Sound~Pink Saturday
Coastal Charm~Nifty Thrifty Tuesday #94 

Tuesday, December 20, 2011

Front Porch Full of Wonder & Christmas Lights in Central Oregon

My dear hubby got the lights up weeks ago & we had to start from scratch this year since I gave away all our outside decor before we moved.  Our son now proudly displays it all in their yard.  So we found some lights at Jerry's Home Improvement Store & large ornaments at Costco, along with other goodies from other places.  We will add to our lights each year, but this was a good start for this year.  So here is the tour...
My studio is in the front with the arched window!
A wreath I made several years ago.
My finds at Goodwill: sled $4.95 & bear $1.99!
I got this at Craft Warehouse for 75% off~ $5.00!  I added my own painted face!!
The REAL Reason for the Season!
 When we were in Central Oregon visiting our kids, we all went to look at the light show at Eagle Crest, a resort in Redmond.  They always have a lot to look at & I tried a new setting on my camera & actually got a few pictures that you could see!
Last, is a church in the area which had this display.  It was hard to get a good picture because of the traffic, but you get the idea...
 Well, more to get done before Christmas.  I have a couple more gifts to show you next time, with a tutorial.  Hope you are enjoying the days before Christmas & remembering the Reason for the Season!


Blessings,
Cindy


I'm linking to these parties:
Savvy Southern Style~Wow Us Wednesdays #45
Beach Cottage Christmas Twinkles~Good Life Wednesdays
White Wednesday #132 @ Faded Charm


Monday, December 19, 2011

Quick & Pretty Ornament Idea


I made some ornaments for family & friends that I wanted to share with you.  The pictures aren't great, but they are easy & fun to do.  I didn't take pictures while I did these so I will have to do that for the next one I make.  Here are the instructions... 

What You Need:
Plastic Snowflakes already glittered
picture
1 1/4 circle punch or template
punches of choice
ink pad
sticker
ribbon
embellishments
sealer spray
glitter
glue gun or tacky glue


I used snowflakes from Walmart, but they are at the dollar store & many other places.  I chose a picture I wanted for the center & printed it on matte photo paper.  I punched out the picture with a 1 1/2 circle punch.  You can also use a template & cut out.  This is experimental on getting the right size photo to fit in the punch.  I got some pretty cardstock that would look nice with the photo and punched it out with a 1 1/2 inch scalloped edge punch.  Make two of these, one for each side of the snowflake.  I wanted a 3rd layer, so I cut out a square of glittered designed paper about 2 inches & used Victorian paper edgers scissors to trim all sides of the square.   I trimmed the corners a little to have a slightly rounded look.  I added ink around the edges in a coordinating color to compliment the paper square in cardstock.  Again, make two of these for front & back of the snowflake.  I made a small bow to fit on the bottom of the snowflake.  Before assembly, add a wire hanger to the top of the snowflake inside the top hole.  Then glue the paper pieces together with a glue gun or tacky glue, the large glitter square 1st like a diamond shape, the cardstock square on the opposite angle next, then the photo on top centered.  For the back, use the same stacking method, but add the sticker instead of the picture.  Add the ornament or tassel in the bottom hole in the snowflake, trimming if necessary for it to hang straight.  Add glue if needed.  Then add the paper stack to the front of the snowflake using your glue of choice.  You may need to add a book to weight it down for drying if using tacky glue, so it dries flat.  I waited between drying to add the back papers.  I used the glue gun for the latter ornaments with nice results and didn't have to wait.  Finishing touches are to add the bow on the front and you can add a gem or glitter brad {with back removed} to the back of the ornament on the bottom, opposite of the bow.  Spray with sealer to protect the picture.
I added glitter around this picture.

vintage ornament added
Learn from my mistake; don't cover pic with contact paper.  It changes color!
The angel image is from Graphics Falry
There are many embellishments you can add, but I kept it simple.  I added vintage bells to some instead of a tassel or ornament.

Blessings,
Cindy

I'm linking to these parties:
Vintage Gwen~A Special Christmas Soiree
My Uncommon Slice of Suburbia~Tuesdays Treasures
Coastal Charm~Nifty Thrifty Tuesday #93
Hope Studios~Tutorial Tuesday!
By Your Hands~Blog Party Sunday Handmade Christmas
White Wednesday @ Faded Charm #131
 

Sunday, December 18, 2011

DIY Pretty Framed Bird Print


I have a wonderful friend, Melody, who loves birds.  My dear hubby and I were heading over to see our kids in Central Oregon this weekend & stopping by Melody's house to pick up some carefully hidden vintage ornaments she had gotten me.  She was out of town so I couldn't see her.  I wanted to make her something she would like to add to her pretty decor & remembered some images of birds that I had saved from The Graphic's Fairy.  From there, my mind took over & with a silver plated picture frame I had been saving, paper, & glitter, I came up with my gift for Melody.  I thought I'd share the steps if you'd like to make a version of your own.

Items you will need:
frame
print, picture, or image 
coordinating scrapbook paper
printed words or verse
ink pad
ink or makeup pad
glitter dimensional paint
glitter
stick glue
decorator chalks, if desired
embellishments of choice/tacky glue

Pick out a frame and image; print the image to fit the frame with at least 1/2 inch space on either side, plus a space large enough to fit your words or verse.  My frame is a 5x7, with a 3 1/2 x 5 inside measurement and I printed my image 2 x 3.  Cut the image edges with a decorative scissor.

Next, using the ink blotter pad, ink around the edge of the print with a coordinating ink, not a dark color; something muted like gray or brown.  I used gray.  

I worked with my word program on my computer and chose a bible verse about birds that I typed in a size 8 font.  It is 18 font for the picture so you could see it more clearly.  I centered the verse and printed it on a medium thick white cardstock.
I cut my coordinating cardstock scrapbook paper to fit my frame using the paper inside the frame as a guide.  I got my paper from the "Lost & Found Two" by My Mind's Eye {6x6 pad}.  I also cut loosely around my verse so I could size it when the paper & print were in the frame.  This will vary with what you use & your size of frame.  
When I figured how much space I had, I then cut the verse closer with the same decorative scissors as I used on the print and cut each end to resemble a banner.  I continually checked for size & position as I did these steps to make sure everything fit.
I inked around the verse edges with the same ink.  Here is a close up of the banner cut edges...
Of course, I had to add some sparkle, so next is the glitter.  I used an old margarine lid and carefully put the dimensional glitter paint around the edge of the print & the verse very lightly.  You can overlap onto the lid so you don't overdo the thickness of the glitter paint.  Then sprinkle liberally the glitter & let it set until it dries, about 1/2 hour or so.  Then tap off the excess glitter & blow off the remaining loose sparkles.  

The next step is your choice to do or not.  I like to add a little extra color & sparkle to my prints.  I used the decorator chalks on the nest and the bird wings applying with my finger.
Then, using the glue stick, glue down the print & verse to the scrapbook paper.  I added my embellishments after putting the finished print in the frame.  I had a stick with moss that I used along with a mushroom bird.  I used tacky glue to attach them.  I added glitter to cover the glue & add some more sparkle...yeah I really needed to do that!!
After the glue had thoroughly dried, I used a can of air to blow off the excess glitter.  I did this step because the moss had collected more than I wanted.  I wanted a more subtle look. Hmmmm glitter & subtle don't go together, do they?  LOL! 
 So here is the finished framed piece...
 I enjoy making gifts that fit the person.  Melody got home & found her gift hidden where she had left my beautiful ornaments for me.  She text me this message..."Oh my gosh!  I found my gift!  You are SO amazing!  Thank you so much!  I love it!"

And that is why I do what I do...


Blessings,
Cindy

I'm linking to these parties:
Anything Goes At Eye Heart #6
Homemaker on a Dime~Creative Bloggers' Party & Hop 12.18.11

Graphics Fairy~Brag Monday

Faded Charm Cottage~White Wednesday #133